Postfix Admin - Web Interface for Manage Users
Postfix Admin is a web based interface to configure and manage a Postfix based email server for virtual users. PostfixAdmin requires php packages and one web server to run.
Download Postfixadmin
Normally postfixadmin is present on the default repositories of Ubuntu 18.04 but it will try to install Apache and PostgreSQL instead of Nginx and MySql. So, to keep our configuration, we will download the actual latest version 3.2 from source on the Github site project and save it in /opt folder.:
wget -P /opt https://github.com/postfixadmin/postfixadmin/archive/postfixadmin-3.2.tar.gz
Now go to that folder and uncompress it.:
cd /opt && tar xvf postfixadmin-3.2.tar.gz
Now we should rename it.:
mv postfixadmin-postfixadmin-3.2/ postfixadmin
Normally we should move postfixadmin to the root folder of our Nginx web server but with this new version, we will only create a symbolic link of the public folder which contains the script then, rename it for some security
ln -s /opt/postfixadmin/public/ /var/www/html/pfa
Create the postfix database
Now we should connect to mysql database for some configurations
mysql -u root -p
Then create the database and the user
mysql> CREATE DATABASE postfix;
mysql> CREATE USER 'postfix'@'127.0.0.1' IDENTIFIED BY 'postfix-password';
mysql> GRANT ALL PRIVILEGES ON `postfix` . * TO 'postfix'@'127.0.0.1';
mysql> FLUSH PRIVILEGES;
mysql> exit
Configure postfixadmin
Now that we have configured the database, we should indicate it to postfixadmin so that it could know where to get the information. To do this, create the /opt/postfixadmin/config.local.php file and add the content on /opt/postfixadmin/config.local.php file.
<?php
$CONF['database_type'] = 'mysqli';
$CONF['database_user'] = 'postfix';
$CONF['database_password'] = 'postfix-db-password';
$CONF['database_name'] = 'postfix';
$CONF['configured'] = true;
?>
we should need to create templates_c directory manually and give www-data permission.
mkdir /opt/postfixadmin/templates_c
chmod 755 -R /opt/postfixadmin/templates_c
chown -R www-data:www-data /opt/postfixadmin/templates_c
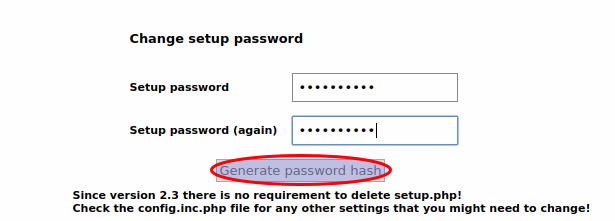
Then access https://yourdomain.com/pfa/setup.php you will see that it works now and it checks all the configuration, shows the version of your php and Ubuntu. Now we should create a password for the setup and generate its hash
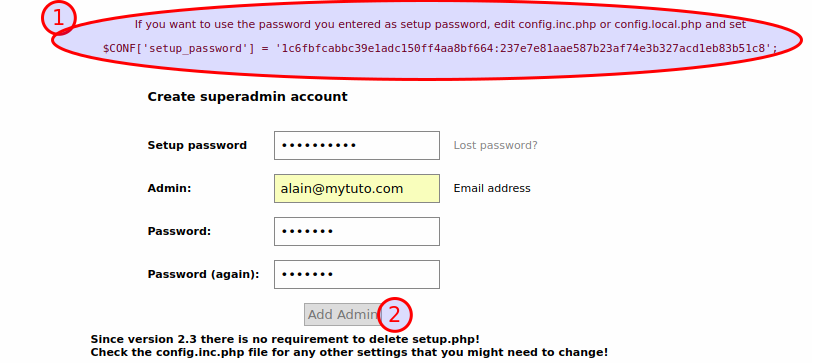
Now create your superuser account by filling below form.
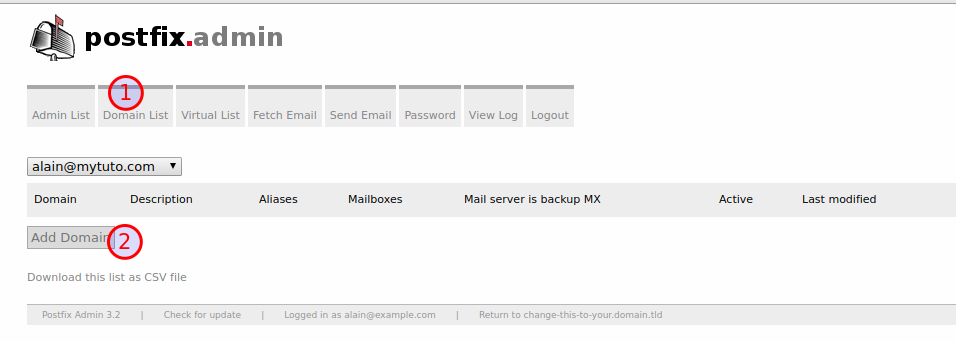
Create virtual domains, users, and alias
Now we will create the virtuals domains, then the users. A domain is a domain name such as mytuto.com. You can have emails on your domain using the same server. When you start you don’t have any domain.
To add a domain, go to Domains List -> New Domain.
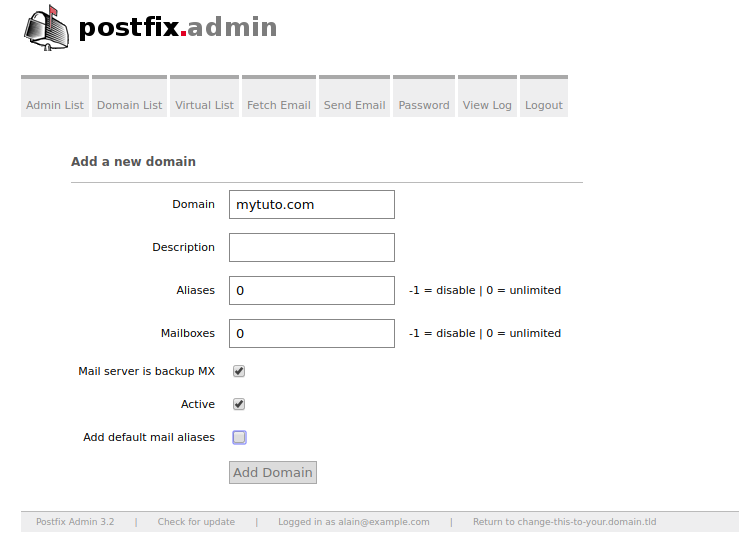
Then enter the information about the domain. You can limit the number of aliases and mailboxes. Remember to add the MX record. When finish to choose your values, add the domain.
We can now create our virtual users. To do this, go to Virtual List -> Add mailbox.
